Monday 28 March 2011

All Aboard!

It's time for another Counterfeit Kit Blog Hop and I'd like to welcome you aboard from Glinda's place (if you just happened along from somewhere else you may like to start at the beginning back on the CKCB).

This month's blog hop challenge was to use our kits to counterfeit one of our own pages, so I had a little look through my albums and decided to have another go with a page from last September (which completely coincidentally uses some of the same papers from last month's counterfeit kit!) based on Twisted Sketch #66.


I'm still ploughing through photos from last November's Egyptian holiday, and decided to add a second photo rather than a journalling card. The use of patterned paper instead of card as the background also changes the dynamic completely. 
 
I was also joining in with a challenge on UKS which meant I needed to use scraps, add some bunting and a stamp too. I'm not really a fan of the bunting-on-every-page-trend, but I reckoned it was acceptable on a page about boating.  My bunting is made from triangles of scrap cardstock - I was distressing the edges of each triangle with scissors when they started to come apart revealing a suede-like inner surface which I rather liked, so each trangle made two flags!

Thanks for stopping by - if you want to see more counterfeiters' in action then pop over to Gabrielle's blog to see what she has scraplifted with her kit.

Friday 25 March 2011

Five on Friday #1

Today is Day #5 of Blogging For Scrapbookers - Are you taking part?  Are you keeping up?  Well it's 4 days since I promised myself I wouldn't post every day, which must mean I'm doing really well, not having posted since then!!  I have been good and read each prompt on the day it was posted, but then there's still plenty of time for me to get behind, especially as I am working a 9½ hour shift tomorrow!

Prompt #5 was about photos - which is lucky because I was out with my camera and wanted to share my favourite photo of the day - straight from my super-duper little point and shoot Canon Powershot A700. Love the sunlight through the leaves of this Hellebore.


I used 5 different types of card and paper to make the latest instalment of my 2011 Project 12 album.  I'm not using the supplied Pagemap sketches this year, and have decided to keep the same format each month - collage on one side and journalling on the other - hopefully I won't get bored with this before December.


Coincidentally that double layout includes page #5 from my March Counterfeit Kit - my pages haven't been as prolific this month, but not bad considering I started two weeks late!


And the final 5?  Well it's the number of audition layouts you have to submit to enter the Scrap Factor Contest over on UKScrappers.  There is a category each for paper, digital and hybrid scrappers and a massive £500 first prize for the creative soul that makes it through to the end!  Good luck if you enter :D

Tuesday 22 March 2011

Blogging For Scrapbookers

I never could quite understand Blogging.  Just what was the point of it?  Keep a diary by all means, create scrapbook pages with lots of journalling, preferably on hidden tags, but sharing all that personal "stuff" with (im)perfect strangers?  NOT a good idea!

That was then ...

... this is now!
I was perfectly happy spilling my available time into UKScrappers (I belong to perhaps the chattiest team on the boards!), sharing my scrapbook creations in the galleries, exchanging comment lurve, joining in with the challenges.  BUT a couple of space-saving culls decimated my on-line gallery over there and more and more challenge sites demanded link-backs to enter their competitions ... and so this blog was conceived!

After a gestation of nearly 8 months I'm still not 100% comfortable with the whole idea - a mix of self-conscious bemusement, paranoia about identity theft, and worry about the amount of time which blog surfing can consume.  BUT I have found it strangely satisfying to share stories with other bloggers, pages with other scrappers and wander around the cyber community that is Blogland!

With perfect timing, this week sees the start of Shimelle's "Blogging For Scrapbookers" which, I hope, will hone my blogging skills, both  literally and, perhaps, lyrically!

♥ I'm not intending to post every day - BUT I do promise to think hard about each prompt on the day that it arrives and join in with the forum discussions.

♥ I'm not intending to start following all my classmates' blogs - BUT I do promise to read at least dozen a day to learn from their journeys as well as my own and leave comments to say that I've visited.

Monday 21 March 2011

No Direction?

At the end of last year I was checking up on my boys at university browsing randomly on Facebook when I spotted that No.2 Son had a new profile picture. For a mad moment I thought he'd photoshopped his face onto a publicity shot of the latest boy band sensation on the X-factor, before recognising the other lads in the group! I messaged him:
"You look a bit like you've been on the X-Factor ... "No Direction" perhaps?"
And so this page was born - the first from my March Counterfeit Kit adding only a few brads.


I used the Sunday sketch from The Studio (loosely) and tied it in with the weekly challenge on UKS too - so sketch and paper ruffle for The Studio, bling, 1 photo and "white" space for UKS!!!


Just in case you're not an X-factor viewer ... and I count myself among that number, but I am blessed with No.3 Child who likes that sort of thing, so cannot avoid it ... here is a photo of the boy band in question (the curly-haired lad is from a local school)!

One Direction, photo courtesy of the UK Fan Club

Saturday 19 March 2011

Photo Collage

I sent a photo collage over to the Counterfeit Kit Challenge Blog by way of an introduction.  It's obviously 100% clear to me what each of the photos means, but for the record I'll explain each of them ... perhaps there's material for a scrapbook page here too:


Starting with the obvious - I love books; that's a pile of some of my all time favourites.  My house is already full of books and I do occasionally buy more, but I'm making the most of the public library at the moment - it's a wonderful (but threatened) resource and stops my house from overflowing!

Next there's a page I did for a circle journal about my favourite colour, followed by a picture indicating just how long I've been in the IT industry: punched paper tape!

After that a butterfly jigsaw piece I created as part of a jigsaw swap to represent my love of crafting, which is often accompanied by a lovely cup of Typhoo tea: my first and last drink of the day (with several in between).

Then there's a suitcase - the picture is nabbed from the internet, but I wish I owned one in real life - as it shows that I'm British and love travelling.

The final two photos show one of my newest hobbies, geocaching, and one of my oldest hobbies, Tae Kwon Do, which consumed my life for a while: I was training four nights a week and reached blue belt.  Unfortunately injuries and travelling put paid to that, but I'm hoping that the geocaching will be with me for a long time yet and will actually help me to stay fit!

It was a fun exercise to try and find photos that summed me up - why don't you give it a try - leave me a link and I'll come and find out about you!

Thursday 17 March 2011

KI Pocket Tutorial

♣ Happy St Patrick's Day ♣

Part of March's Counterfeit kit-to-copy featured some KI 5” x 10” ledger pockets (in the Studio Calico Babbling Brook Add-on Kit) which have side gussets to allow them to hold more “stuff” - several tags, tickets, pieces of ephemera, photos etc. Yet another item in the kit that I don't have in my stash. So, in the spirit of the CKCB I decided to have a go at counterfeiting rather than just substituting an ordinary envelope.

I had a couple of false starts but that’s how you learn right?! In case you wish to learn from my mistakes here's a step by step guide.

Instead of ledger paper, I used some blank pages saved from a childhood stamp album. They measure approximately 22cm x 26½cm (8½” x 10”), have a grid on one side and are plain on the other. The finished pockets measure around 11½cm x 18cm (4½” x 7”) with the actual pocket being 8cm (3”) deep, but that was largely determined by the grid pattern - the method can be adapted to any size of paper though.

To make the gussets first score 1cm (⅜”), 2cm (¾”) and 3cm (1⅛”) in from the long edge of a piece of paper measuring around 4cm x 15cm (1½” x 6”). NB: I scored along the spare long edge of my stamp album paper, and then trimmed it off.
I ran a scoring tool along the cutting edge of my trimmer - a scoring blade or scoring board would work too, or just measure with a ruler and score along that.


Fold along the score lines to make a zig-zag profile and crease well. Trim this strip to make two gussets which are just slightly less than the depth of the actual pocket, taking account of any borders you intend to cut.

For the actual pocket score 8cm (3”) up from the short side of the remaining paper.
The next step depends on whether you use single or double sided papers.

For double-sided papers: Trim the paper to measure 19½cm (7½”). Decide which pattern you want to be at the back of the pocket and fold along the score line accordingly.

For single-sided papers: Score again around 11½cm (4½”) away from the previous score line. Fold the paper along this score line (wrong sides together) so that the plain back of the paper is concealed and glue down. Fold along the remaining score line to form the pocket and concealing the plain back of the paper.

Folding plain sides together to cover the pocket back        Single- & double-sided papers give different effects

An alternative for single-sided papers is to use the double-sided paper method and cover the plain back of the pocket with a sheet of matching or contrasting paper the same width as your pocket and around 6cm (2½”) deep.

If you want to use border or corner punches on the pocket flap, now is the time to do it!

Stick the gusset strips to the underside of the pocket flap along both the left and right edges.


Apply glue/tape to the other side of each gusset and stick the pocket flap to the back of the pocket.  Round some/all of the four remaining corners and you’re done!


KI make these pockets in lots of different sizes: 12x12, 10x5, 5x5 and 3x3, with some fabulous colour combos and border styles ... I can see I shall be doing lots more counterfeiting; after all imitation is the sincerest form of flattery!

Wednesday 16 March 2011

Forging Ahead

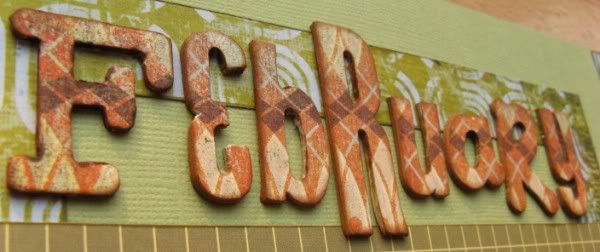
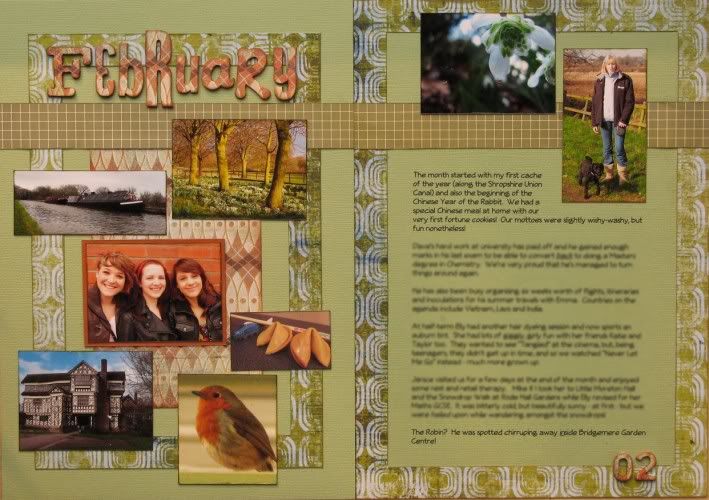
"Into The Woods" by Studio Calico
This month's kit-to-copy from the Counterfeit Kit Challenge Blog is by Studio Calico!  SC produce a monthly kit and several separate add-ons; the kits are limited in numbers, incredibly popular and sell out very quickly.

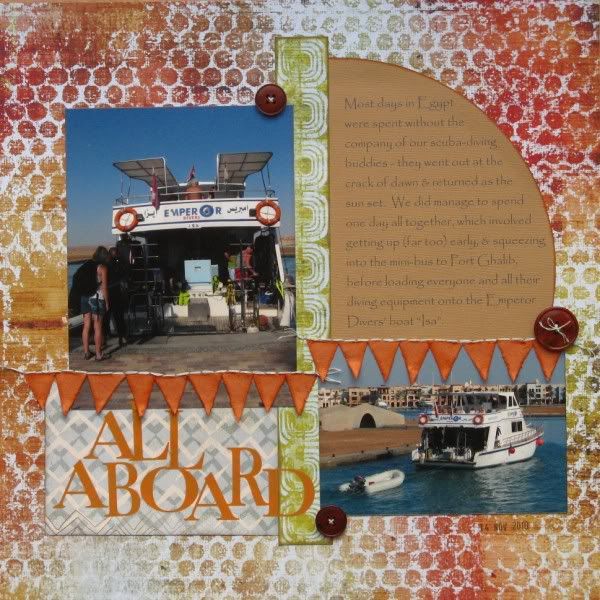
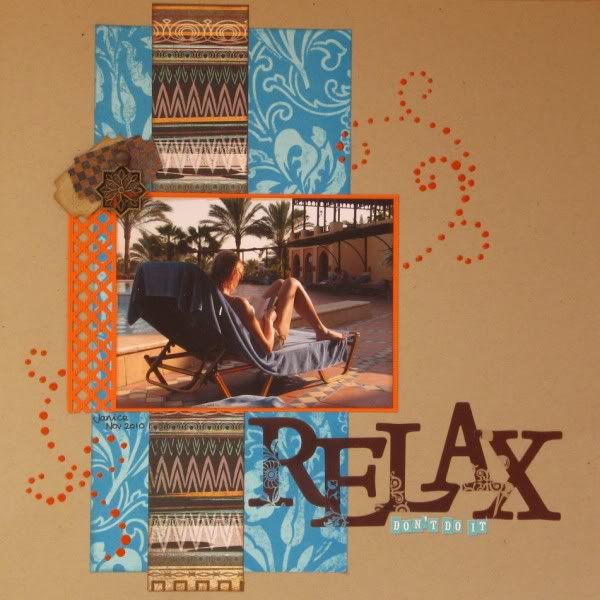
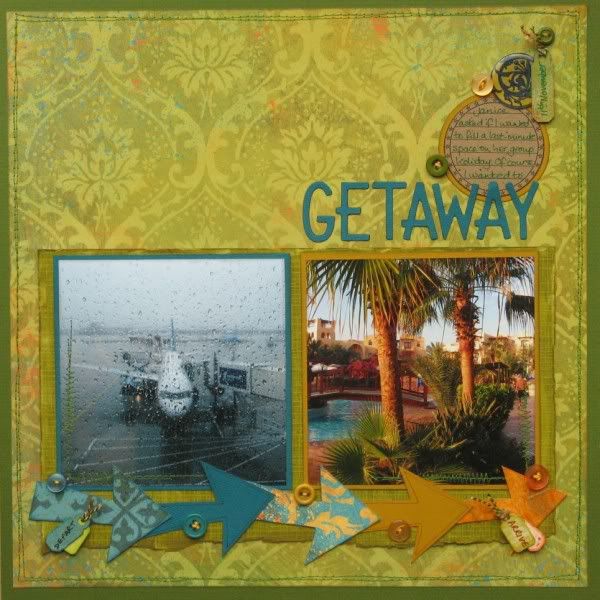
Hmmm - not my kind of stash - I'm not a fan of wood-grain or indeed woodland creatures - and only FOUR buttons???!!!   However the whole point of counterfeiting these kits is to make use of your existing stash supplies, so with a few substitutions, the addition of plenty of extra buttons and a piece of ribbon or two, I have produce my March kit:


Cardstock:
2 blue, 1 brick red, 2 beige, 3 Bazzil pear, 2 Coredinations brown

Papers:
2 Cameron, 1 Sentimental, 1 Wisdom (all Dream Street Papers)
¾ Passé, 1 Fossil (both Basic Grey)
1½ double sided Drivers Ed (green & cream arrows on the other side) by Cosmo Cricket
1 double sided Golden Rubies (ruby red on the other side) by My Mind’s Eye
Ogee template & a piece of Kraft card

Embellishments:
4 Jenny Bowlin Journalling cards
Sei alphabet stickers in bronze
MLS Mini Alphabet Stickers in mint/black
Various chipboard frames and arrows
Embossed brown felt
Chipboard label
2 Banana Frog Butterfly stamps
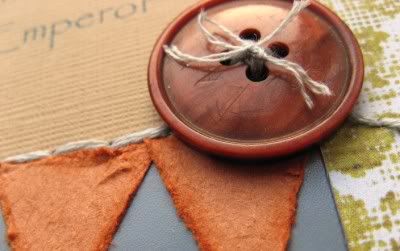
4 Buttons (far too few!!!)
Extra buttons & ribbon

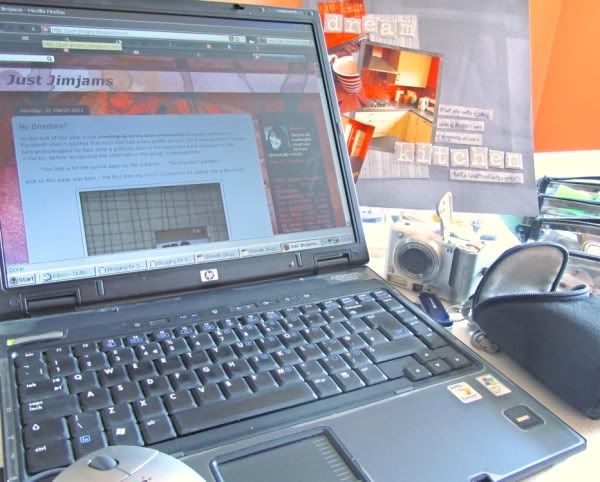
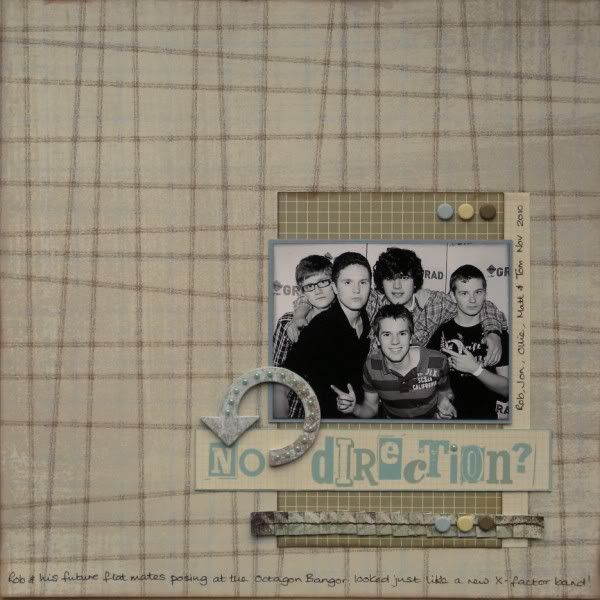
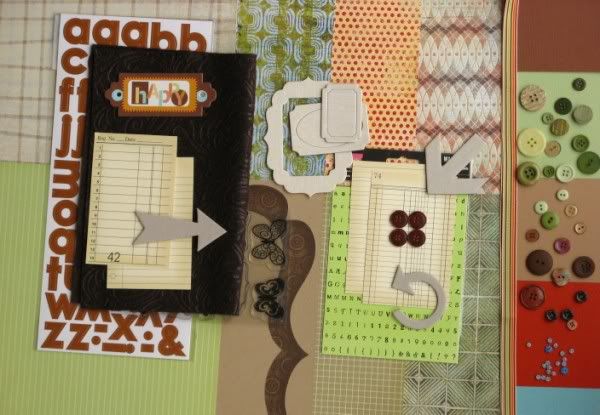
"Babbling Brook" by Studio Calico
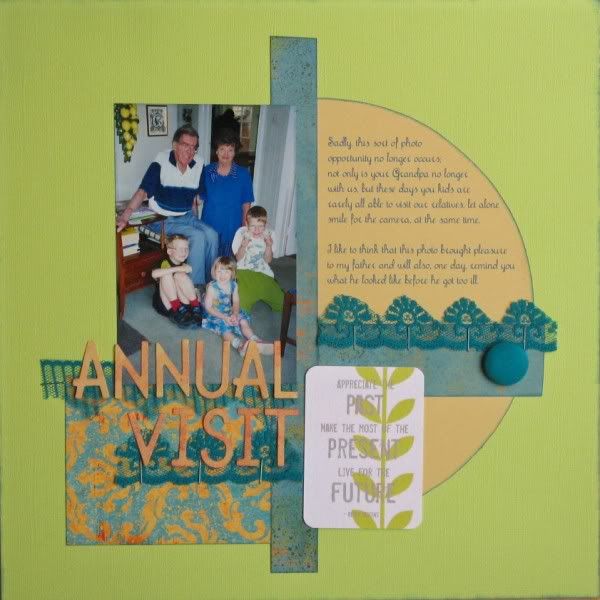
I've only just managed to put together my March Counterfeit Kit as I was away earlier this month so I have attempting to reproduce just one of the four 4 add-on kits - especially as I have only half the month to actually use the kit in!  The original add-on kit from Studio Calico looks like this:

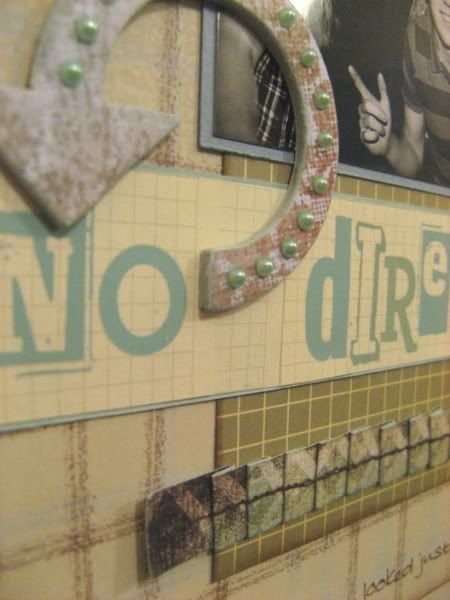
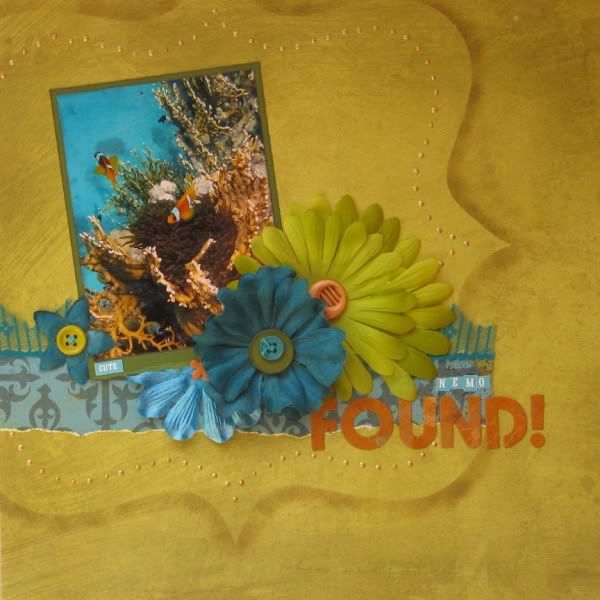
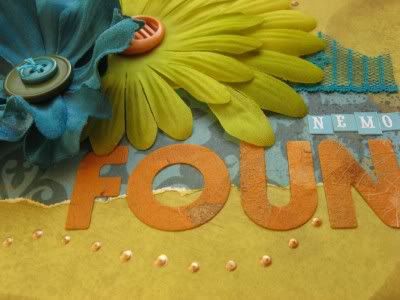
I have yet to look through my stamps to reproduce the circles background stamp, and I added another couple of ribbons and some (already 2nd hand) rub-on alphas instead of the chipboard alphas:


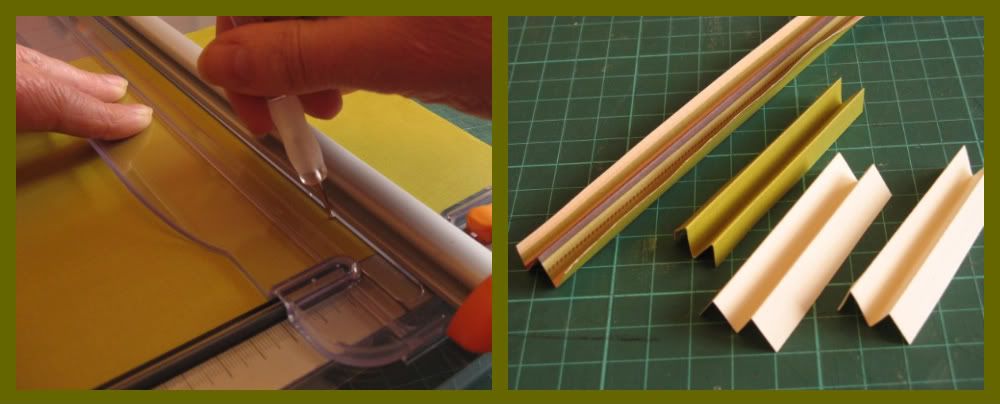
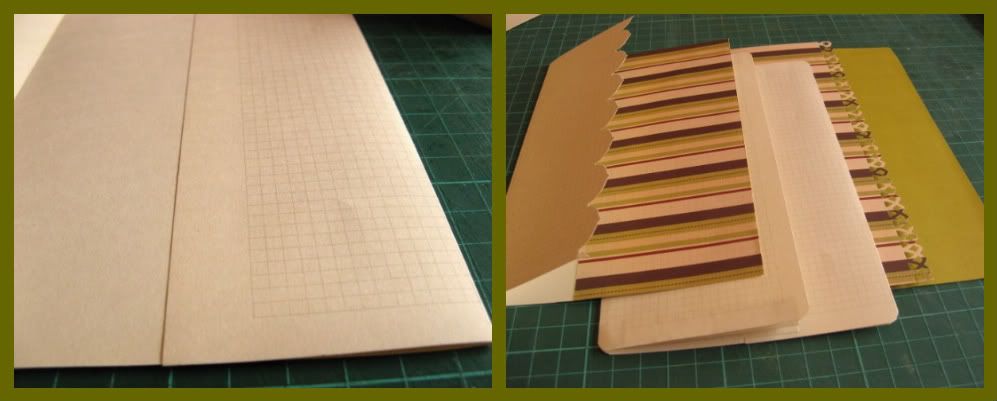
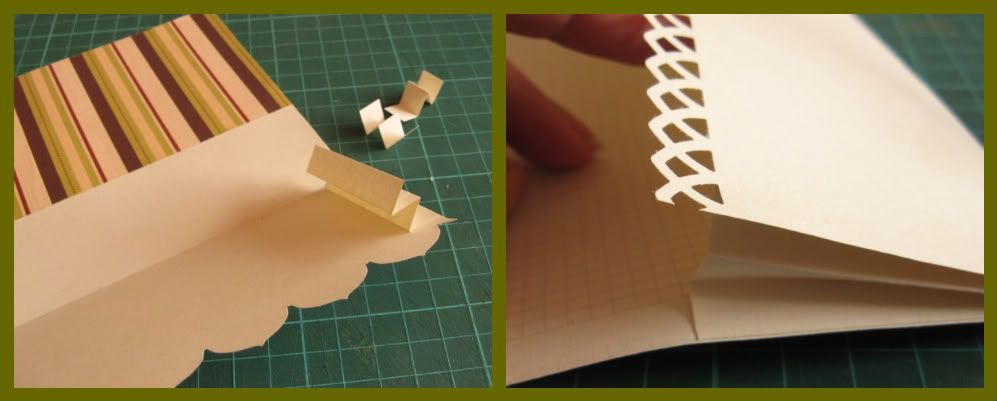
The gusseted KI Ledger Pockets have been simply made from empty pages out of a childhood stamp album - tutorial added here!  
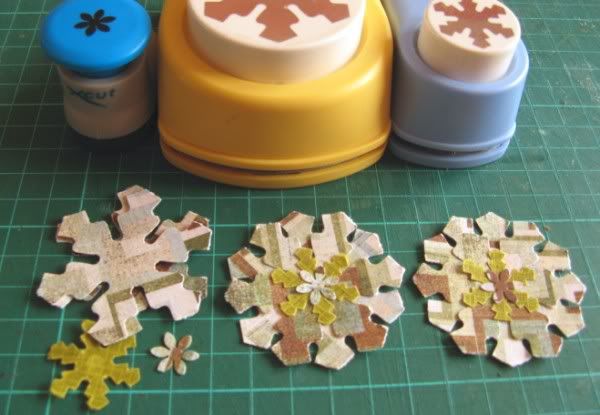
I don't have a butterfly punch so I substituted dragonflies and rather than doilies, I made some flower shapes from snowflake punches and some BG scraps:
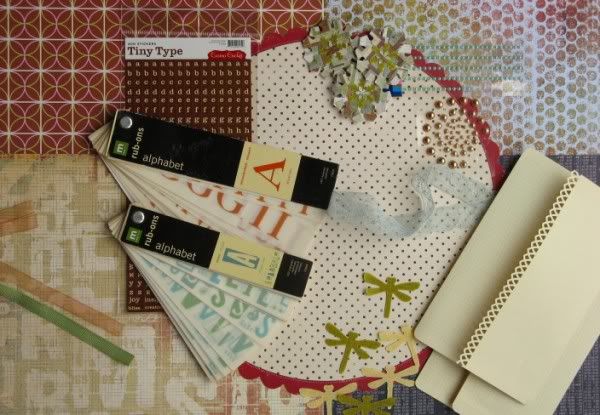

Add-on Kit Papers:
1 Creativity, 1 Maudlin (both Dream Street Papers)
1 Erroneous by Basic Grey
1 Navy Wallstreet by Mustard Moon
1 MM Scallop Circle

Add-on Kit Embellishments:
Cosmo Cricket Tiny Type alphas in brown/cream
¾ MM Mixed Muted alphabet rub-ons
½ MM Misunderstood Monarch alphabet rub-ons
Pale blue lace
Pale blue & beige pearls
Home made snowflake flowers
Punched dragonflies
Extra ribbons

Most of the kit papers are double-sided and most of mine are not, so I'll be interested to see how well it works this month.  Better get scrapping now!

Tuesday 15 March 2011

MF aka DTM @ CKCB

I was away in Lazio, Italy last week chilling in the (chilly) mountain sunshine amongst the olive and mimosa trees.


When I returned home there was a mountain of bills, circulars and e-mails to deal with, but there was also one bright ray of sunshine in amongst the pile ... I've been accepted as Master Forger also known as Design Team Member at the Counterfeit Kit Challenge Blog!!!!
*insert BIG smiley face here*

Saturday 12 March 2011

I did it MY way!

And now, the end is here
And so I face the final papers
My friend, I'll say it clear
I've made some scraps, and stuck my alphas
I've used a box that's full
On each and every crop day
And more, much more than this, I did it my way!

Apologies to Frank Sinatra, but I really have come to the end of my February Counterfeit Kit which didn't conform to the colour scheme of the original kit-to-copy.
Here it is - my ELEVENTH and final page made last Saturday at my, coincidentally, final crop in Wrenbury.


More dimensional paint dots to add a swirl onto this page of my friend reading on holiday in Egypt - we did a lot of that - I think I read 4 whole books in a week!  As the kit is almost empty I had to add a sheet of Kraft card for the base and found a scrap of orange card to mat the photo with.  My team on UKS were also setting challenges last week, and this one needed a "found" object so I added the little plastic "thing" along with tickets made with a Sizzlits die.

Main Kit + Add-on Kit = Eleven Pages + Remnants
And there you have it - from a pizza box full of stash to a plastic bag full of scraps ... and a few unused bits and bobs that need to be put away before I can start on March's kit.

Tuesday 8 March 2011

Getaway

How appropriate to schedule this post while I am, in fact, away!  I won the January Sketch Challenge over at Sarah's Cards Blog and part of the pay-back was to produce a page for their March Sketch Challenge. Hopefully it went live yesterday March 7th!

Here you go: another page from my Egyptian Adventure last November, made from my February Counterfeit Kit.


I wanted the photos to be the same size so I had to crop them square as one was portrait and one landscape, but I matted them with different colours to emphasise the contrast in content.  Title alphas are cut with Sizzlits Go Go Boots dies.

Having had the drop on the sketch for this challenge I'm really looking forward to seeing what Sarah's DT and the rest of the bunch make of it!

Monday 7 March 2011

Lost & Found

Over at The Studio at the weekend there was a fabulous blog hop, based on a Pencil Lines Sketch:


At Saturday's crop I managed to squeeze out another couple of pages from my February Counterfeit Kit - it really is just scraps now - and I used this sketch as inspiration for one of them:

Photo of Clown Fish couple courtesy of my fellow snorkeller - thanks Janice!
Just one sheet of paper, a scrap of lace, some of the blooms (made from de-contructing artificial flowers), a few more buttons (I was generous with those when I made the kit), a brad, some more of the teeny tiny alpha stickers, and the title alphas cut from handmade paper using Sizzlits Boys Will Be Boys dies. I used a Crafters Template as a mask and for the outline of Liquid Pearls.  My UKS team-mate Pat told me that you can reduce the pointy part of the pearl dots by flicking the back of the paper ... it really works!


This page also earned me some "points" on UKS as it fitted in with the final challenge from February - using fabric/lace, a technique taught by a friend, but sadly no purple!

Sunday 6 March 2011

Excess Baggage

Are you sitting comfortably for March’s Storytelling Sunday?             Then I’ll begin.

I’ll soon be flying off for a short break in the sun/warmer cloud/less acidic rain and as I’ve refused to pay extra to take a suitcase, I have to either pack everything into my hand luggage or wear it!  Airlines are fussy about what they let you take into the cabin these days and I don’t fly that often so I needed to check what I am and am not allowed to take on board!  I’m not sure if the rules have relaxed recently but I find that I can now take knitting needles and even a travel iron inside the plane, but I’m sure that my fellow passengers will be glad to know that I still can’t take a harpoon with me!

Airline Liquids

This got me thinking back to a time when I flew more (as in distance and frequency), accompanied only by my younger brother, to visit our father in Lagos, Nigeria. We loved the sandy beaches, colourful streets, sunny poolsides and exotic fruits. My stepmother taught me to play bridge and my father taught me to water-ski behind his motorboat. It was all very exciting and different from home.

However, like any ex-pat, my father and his new family missed various things from the UK, and we would be tasked with bringing supplies of items like Typhoo tea, Weetabix, and Heinz Baked Beans with us.  At Easter we’d have to bring chocolate eggs too - at least that way, we got to choose our own!

The most memorable item we ever had to take arrived by post at our house just in time to be packed.  Although it was only about 14” across, it was far too heavy to fit into our suitcase and would have probably ripped the case to shreds when it was manhandled on and off the baggage trolleys anyway!  So, as the cabin baggage wasn’t normally weighed, it was decided that I, being a few years older than my brother, would have to carry the item in a small cabin case and hope that it wasn’t confiscated.  Back then, we didn’t have the sophisticated checks and scans that today’s passengers have to endure; the airport officials would look inside bags at random before allowing you through to the boarding gate.

Guess who got checked?!  I think that the giveaway might have been the lopsided way I struggled to carry such a heavy bag while also steering my little brother down the corridor.

What’s this?” asked the man, although it was actually fairly obvious, despite being wrapped in my beach towel to separate it from the sausages and Cheshire cheese that had also been requested.

A propeller.” I replied; his eyebrows went up a notch.  “For a motorboat.” I added helpfully.

Why are you taking a propeller with you?

Dad's boat needs a new one.

Fair enough.” he snorted, lowered his eyebrows and waved us through!

I wonder if I'd manage to do the same these days?!

Want more storytelling?  Check out Sian’s blog for the other Sunday Storytellers and perhaps even share a story of your own.